Category: Garage Door Page 1 of 2

How to Choose the Right Garage Door Replacement – Garland Garage Door & Gates Repairs

When it comes to home improvements, few upgrades have the potential to enhance both the functionality and aesthetics of your property like a new garage door. However, choosing the right garage door replacement requires careful consideration of various factors to ensure you make the best investment for your home.

In this guide from Garage Door Repair Garland TX, I’ll walk you through the essential steps and considerations to help you select the perfect garage door replacement.

  1. Assess Your Needs and Preferences: Before diving into the myriad options available, take some time to assess your specific needs and preferences. Consider factors such as your budget, desired style, material preferences, and any additional features or functionalities you require. Understanding your priorities will narrow down your options and simplify the decision-making process.
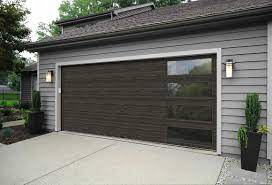
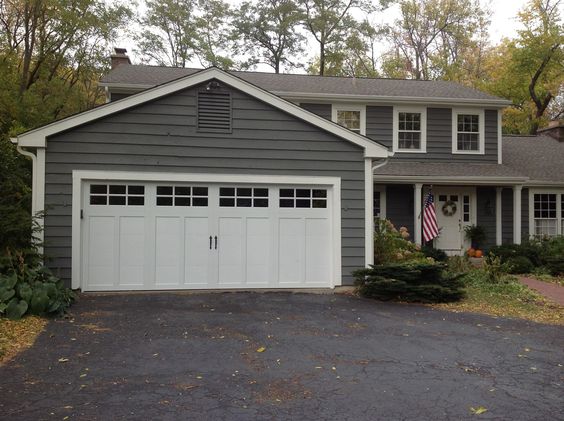
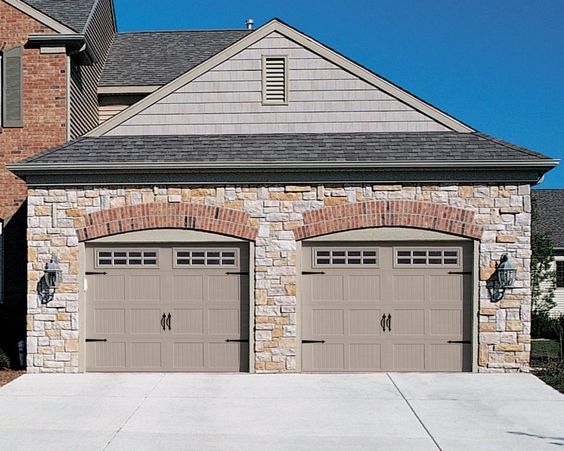
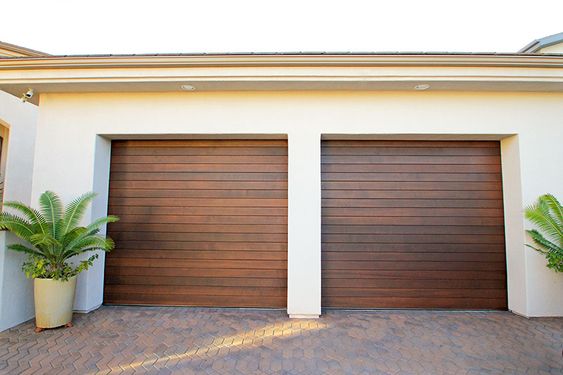
  2. Determine the Right Style: Garage doors come in a wide range of styles, from traditional raised-panel designs to modern contemporary options. Consider the architectural style of your home and choose a garage door style that complements it seamlessly. Take into account factors such as window placement, panel design, and decorative hardware to achieve a cohesive look.
  3. Select the Appropriate Material: The material of your garage door not only affects its appearance but also its durability, maintenance requirements, and insulation properties. Common garage door materials include steel, aluminum, wood, and fiberglass. Each material has its own unique characteristics, so weigh the pros and cons carefully before making a decision based on factors such as durability, aesthetics, maintenance, and budget.
  4. Consider Insulation Needs: If your garage is attached to your home or serves as a living space, proper insulation is crucial for energy efficiency and comfort. Insulated garage doors help regulate temperature, reduce noise transmission, and prevent drafts. Look for garage doors with high-quality insulation, such as polyurethane or polystyrene foam, to maximize energy efficiency and comfort.
  5. Evaluate Security Features: Your garage door serves as a primary entry point to your home, so prioritizing security features is essential. Look for garage doors equipped with advanced security features such as sturdy locks, reinforced panels, and tamper-resistant hardware. Additionally, consider investing in smart garage door openers with remote monitoring capabilities and smartphone connectivity for added peace of mind.
  6. Factor in Maintenance Requirements: Different garage door materials and finishes have varying maintenance requirements. While steel and aluminum doors are relatively low-maintenance and resistant to rust and corrosion, wood doors require regular staining or painting to maintain their appearance and protect against moisture damage. Fiberglass doors offer the look of wood without the maintenance but may be prone to cracking or fading over time. Choose a garage door material that aligns with your maintenance preferences and lifestyle.
  7. Explore Customization Options: Make your garage door replacement truly unique by exploring customization options such as color choices, window designs, decorative hardware, and panel configurations. Many manufacturers offer customization options to help you personalize your garage door and complement your home’s architecture and style. Take advantage of these options to create a one-of-a-kind look that enhances your home’s curb appeal.
  8. Set a Realistic Budget: Garage door replacement costs can vary significantly depending on factors such as material, size, insulation, and customization options. Before embarking on your garage door replacement project, establish a realistic budget that takes into account both the upfront costs and long-term savings associated with energy efficiency and durability. Obtain quotes from multiple reputable garage door suppliers and installers to compare prices and find the best value for your budget.
  9. Research Professional Installers: While some homeowners may attempt to install their garage doors themselves, hiring a professional installer is often the safest and most efficient option. Research reputable garage door installation companies in your area and request quotes from multiple providers. Verify their credentials, experience, and customer reviews to ensure you’re entrusting your garage door replacement to qualified professionals who will deliver high-quality workmanship.
  10. Prioritize Quality and Warranty Coverage: When investing in a garage door replacement, prioritize quality and warranty coverage to protect your investment and ensure long-term satisfaction. Choose a reputable manufacturer known for producing durable, high-quality garage doors backed by comprehensive warranty coverage. A warranty provides peace of mind knowing that you’re covered in the event of defects or malfunctions, giving you confidence in your purchase decision.

In conclusion, based from Garage Door Repair Garland TX, choosing the right garage door replacement requires careful consideration of your needs, preferences, and budget. By assessing factors such as style, material, insulation, security features, maintenance requirements, customization options, budget, installation, and warranty coverage, you can make an informed decision that enhances your home’s functionality, aesthetics, and value. With the help of professional installers and reputable manufacturers, you can enjoy a seamless garage door replacement process and years of reliable performance and curb appeal.

Garland Garage Door & Gates Repairs

2014 Frances Dr, Garland, TX 75042, United States

972-388-3587

Preventing Garage Door Break-Ins: Essential Security Measures – Veterans Garage Door

As a homeowner, the security of my property is paramount, and ensuring the safety of my garage is a crucial aspect of overall home security. The garage serves not only as a storage space for valuable items such as vehicles, tools, and equipment but also as a potential entry point for intruders if not adequately secured. Over the years, I’ve taken proactive steps to fortify my garage against break-ins, implementing essential security measures to protect my belongings and loved ones.

In this article, I’ll share my journey and offer practical advice on preventing garage door break-ins with essential security measures by following Garage Door Repair.

Understanding the Risk of Garage Door Break-Ins

Before diving into security measures, it’s essential to understand the potential risks associated with garage door break-ins. Garages are often targeted by burglars due to their relatively easy access and the valuable items they contain. An unsecured garage door can provide intruders with a convenient entry point into the home, putting both property and personal safety at risk. Common methods of garage door break-ins include levering, picking locks, bypassing sensors, and exploiting vulnerabilities in older or poorly maintained doors.

Essential Security Measures for Preventing Garage Door Break-Ins

  1. Upgrade to a Secure Garage Door Opener:
    • Investing in a modern garage door opener with advanced security features is the first step in preventing break-ins. Look for openers with rolling code technology, which generates a new code each time the door is operated, making it difficult for intruders to intercept and duplicate the signal.
    • Consider smart garage door openers that allow you to monitor and control the door remotely via a smartphone app. These systems offer added convenience and security by providing real-time alerts and allowing you to close the door remotely if forgotten.
  2. Install Strong and Secure Garage Door Locks:
    • In addition to the automatic opener, install sturdy locks on the garage door itself for an extra layer of security. Choose high-quality deadbolt locks or padlocks with reinforced hasps to deter would-be intruders.
    • Reinforce the doorframe and hinges to prevent forced entry attempts. Consider installing a metal strike plate and long screws to secure the doorframe to the surrounding structure effectively.
  3. Secure Garage Windows and Entry Doors:
    • If your garage has windows or entry doors, ensure they are equipped with secure locks and reinforced glass. Consider adding window bars or security film to prevent intruders from breaking the glass and gaining access to the interior.
    • Install motion-activated lights around the perimeter of the garage to deter intruders and illuminate dark areas where they could hide.
  4. Maintain Proper Garage Door Maintenance:
    • Regular maintenance and inspection of the garage door and its components are essential for preventing break-ins. Check for signs of wear or damage, such as loose hinges, frayed cables, or malfunctioning sensors, and address any issues promptly.
    • Keep the garage door opener remote secure and avoid leaving it in plain sight in vehicles or other accessible areas. Consider using a keychain remote or keeping the remote inside the house to prevent unauthorized access.
  5. Upgrade to Reinforced Garage Door Materials:
    • Consider upgrading to a garage door made of sturdy and durable materials such as steel or aluminum. These materials offer superior strength and resistance to forced entry attempts, providing an added layer of protection for your home and belongings.
    • Opt for a solid-panel door design rather than one with windows or decorative inserts, as these can be more vulnerable to break-ins.
  6. Install a Security System:
    • Implementing a comprehensive home security system that includes sensors, cameras, and alarms can further enhance the security of your garage and deter potential intruders. Choose a system with integration capabilities that allow you to monitor and control the garage remotely from a centralized platform.

Conclusion

Overall, based from Garage Door Repair, preventing garage door break-ins requires a proactive approach and a combination of security measures tailored to the specific needs of your home. By upgrading to a secure garage door opener, installing strong locks, securing windows and entry doors, maintaining proper maintenance, upgrading to reinforced materials, and installing a security system, homeowners can significantly reduce the risk of break-ins and protect their property and loved ones. Remember that vigilance and regular maintenance are key to ensuring the ongoing effectiveness of your garage door security measures. With these essential security measures in place, you can enjoy peace of mind knowing that your garage is safeguarded against potential threats.

Veterans Garage Door

6497 Parkland Dr F, Sarasota, FL 34243, United States

941-699-6198

A Guide to Installing a Garage Door Screen for Ultimate Comfort – Ohio Garage Door Repair

As a homeowner who relishes spending time in my garage, whether it’s for tinkering with projects or simply unwinding, I’ve always longed for a way to enjoy the fresh breeze without the hassle of pesky insects. Fortunately, I stumbled upon a solution that not only keeps bugs at bay but also enhances the overall ambiance of my garage – installing a garage door screen. This simple addition has revolutionized my garage experience, allowing me to bask in the outdoors while maintaining a bug-free environment.

In this comprehensive guide from Garage Door Repair, I’ll share my firsthand experience and provide step-by-step instructions on how to install a garage door screen, so you too can relish the pleasure of enjoying the breeze bug-free.

Understanding the Benefits of Garage Door Screens:

Before embarking on the installation journey, it’s crucial to grasp the myriad benefits that garage door screens offer:

  1. Pest Protection: Garage door screens act as a barrier against unwanted insects and pests, ensuring that your garage remains a sanctuary free from annoying bug intruders.
  2. Enhanced Ventilation: By allowing fresh air to flow freely, garage door screens promote superior ventilation, keeping your garage cool and inviting, particularly during sweltering summer days.
  3. Natural Illumination: With a garage door screen in place, you can capitalize on natural sunlight, illuminating your space with a warm and welcoming glow that’s both energy-efficient and aesthetically pleasing.
  4. Privacy Enhancement: Depending on the screen material chosen, garage door screens can provide an added layer of privacy, shielding your activities from prying eyes while maintaining an open-air ambiance.

Step-by-Step Guide to Installing a Garage Door Screen:

Now, let’s embark on the exhilarating journey of installing a garage door screen, step by step:

Step 1: Measure Your Garage Door Opening

Commence the installation process by meticulously measuring the width and height of your garage door opening. These measurements will serve as your blueprint for selecting the appropriately sized garage door screen.

Step 2: Select the Ideal Screen Material

Next, carefully consider the screen material options available, such as durable fiberglass, resilient polyester, or robust nylon. Choose a material that aligns with your preferences and requirements for durability and insect protection.

Step 3: Install Tracks or Mounting Hardware

Depending on the chosen garage door screen type, proceed to install tracks or mounting hardware along the sides and top of your garage door opening. Adhere closely to the manufacturer’s guidelines to ensure proper installation.

Step 4: Attach the Screen to Tracks or Mounting Hardware

With the tracks or mounting hardware securely in place, affix the garage door screen to the channels using the provided clips or fasteners. Pull the screen taut to prevent sagging or wrinkles, ensuring a seamless fit.

Step 5: Secure the Bottom Edge

To fortify the garage door screen against insect infiltration, secure the bottom edge using weighted bars, magnets, or Velcro strips. Ensure a snug fit with the ground to seal any potential entry points.

Step 6: Test the Screen Operation

Once installed, perform a thorough test of the garage door screen’s operation by opening and closing your garage door. Verify that the screen moves smoothly and without obstruction, adjusting as necessary.

Step 7: Fine-Tune as Needed

In the event of any operational hiccups, such as screen snags or improper closure, make the necessary adjustments to the tracks, mounting hardware, or screen tension until optimal functionality is achieved.

Step 8: Revel in Your Bug-Free Haven!

With the garage door screen installed and operating flawlessly, it’s time to savor the fruits of your labor. Whether you’re engaging in hobbies, entertaining guests, or simply soaking in the serenity, you can now do so in a bug-free haven that seamlessly blends indoor comfort with outdoor allure.

Conclusion:

Overall, based from Garage Door Repair, installing a garage door screen is a transformative endeavor that elevates the functionality and ambiance of your garage to unprecedented heights. By following the detailed instructions outlined in this guide and selecting the right screen material for your needs, you can create a bug-free sanctuary where you can fully immerse yourself in the joys of outdoor living. So, why wait? Embark on your installation journey today and unlock the boundless possibilities of enjoying the breeze bug-free in your very own garage oasis.

Ohio Garage Door Repair

7201 Longview Dr, Solon, OH 44139

440-773-2246

Repairing a Garage Door That Sticks or Jerks – JT’s Overhead Doors

As a homeowner who takes pride in maintaining my property, encountering a garage door that sticks or jerks during operation was both frustrating and concerning. The inconvenience of dealing with a malfunctioning garage door not only disrupted my daily routine but also raised concerns about safety and potential damage to the door itself. However, through perseverance and a willingness to tackle the issue head-on, I successfully navigated the process of diagnosing and repairing my garage door, restoring smooth and reliable operation to this essential feature of my home.

In this article, I’ll share my firsthand experience, along with practical tips and step-by-step instructions from Garage Door Repair for repairing a garage door that sticks or jerks.

Identifying the Problem:

Before diving into the repair process, it’s essential to understand the underlying causes of a garage door that sticks or jerks during operation. Common issues that can contribute to this problem include:

  1. Lack of Lubrication: Over time, the moving parts of a garage door, including the rollers, tracks, and hinges, can become dry and accumulate debris, leading to friction and resistance during operation.
  2. Misaligned Tracks: If the tracks that guide the garage door are out of alignment or obstructed by debris, the door may become stuck or jerk as it moves along the track.
  3. Worn or Damaged Rollers: The rollers that allow the garage door to glide smoothly along the tracks can wear out over time or become damaged, causing the door to stick or jerk during operation.
  4. Tension Issues: Problems with the tension springs or cables that counterbalance the weight of the garage door can cause uneven movement and erratic behavior.

Assessing the Damage:

Upon encountering a garage door that sticks or jerks, my first step was to carefully assess the extent of the damage and identify the root cause of the problem. I thoroughly inspected the tracks, rollers, hinges, springs, and cables for signs of wear, damage, or misalignment, taking note of any areas that required attention.

Prioritizing Safety:

Before attempting any repairs, it’s crucial to prioritize safety to prevent accidents or injuries. I made sure to disconnect the power to the garage door opener and secure the door in its closed position to prevent accidental opening or closing. I also wore protective gear, including gloves and safety glasses, to protect myself from sharp edges and flying debris.

Gathering the Necessary Tools:

Repairing a garage door that sticks or jerks requires a few basic tools and supplies, including:

  1. Lubricant: To lubricate the moving parts of the garage door, including the tracks, rollers, hinges, and springs.
  2. Adjustable Wrench: For tightening bolts and nuts on the garage door hardware.
  3. Screwdriver: For removing screws and adjusting hardware components.
  4. Cleaning Supplies: To remove debris and dirt from the tracks and rollers.

Step-by-Step Repair Process:

  1. Inspect and Clean Tracks: Start by inspecting the tracks for any debris or obstructions that may be causing the garage door to stick or jerk. Use a stiff brush or vacuum cleaner to remove dirt, leaves, or other debris from the tracks.
  2. Lubricate Moving Parts: Apply a generous amount of lubricant to the rollers, tracks, hinges, and springs to reduce friction and ensure smooth operation. Be sure to use a lubricant specifically designed for garage door components.
  3. Check and Adjust Alignment: Inspect the tracks to ensure they are properly aligned and free of any bends or dents. Use a level to check the alignment of the tracks and adjust as needed by loosening the mounting brackets and tapping them into position with a hammer.
  4. Inspect and Replace Rollers: Examine the rollers for signs of wear or damage, such as flat spots or cracks. If any rollers are worn or damaged, replace them with new ones to ensure smooth operation.
  5. Check Tension Springs and Cables: Inspect the tension springs and cables for signs of wear, damage, or tension issues. If any springs or cables are damaged or out of alignment, replace them with new ones to restore proper tension and balance to the garage door.
  6. Test and Adjust Operation: Once the repairs are complete, test the garage door to ensure it opens and closes smoothly without sticking or jerking. Make any necessary adjustments to the tracks, rollers, hinges, or tension springs to achieve optimal performance.

Preventing Future Issues:

To prevent future problems with a garage door that sticks or jerks, it’s essential to perform regular maintenance and inspections. Keep the tracks clean and lubricated, inspect the hardware for signs of wear or damage, and address any issues promptly to prevent more significant problems down the line.

Conclusion:

Overall, based from Garage Door Repair, repairing a garage door that sticks or jerks during operation may seem like a daunting task, but with the right tools, knowledge, and approach, it’s entirely manageable. By following the steps outlined in this guide and prioritizing safety, you can successfully diagnose and repair common issues affecting your garage door’s performance, restoring smooth and reliable operation to this essential feature of your home. So, don’t let a malfunctioning garage door disrupt your daily routine—roll up your sleeves, gather your tools, and tackle the repair with confidence.

JT’s Overhead Doors

307 N Sandal, Mesa, AZ 85205, United States

480-662-3315

Understanding the Costs of Garage Door Repair – EDM Garage Doors, LLC

As a homeowner who recently faced the daunting task of fixing my garage door, I understand the frustration and uncertainty that comes with unexpected repair expenses. Garage doors are a vital component of our homes, providing security, convenience, and protection for our vehicles and belongings. However, when they malfunction or suffer damage, the cost of repairs can vary widely depending on the nature and extent of the issue.

By following Garage Door Repair, join me on a journey as we explore the factors influencing the cost of garage door repair and gain valuable insights into budgeting and decision-making in such situations.

Understanding the Factors:

Before delving into specific costs, it’s essential to understand the factors that influence the price of garage door repair. Several key variables can significantly impact the overall expense, including:

  1. Type of Repair: The type of repair needed plays a crucial role in determining the cost. Whether it’s fixing a broken spring, replacing damaged panels, repairing a malfunctioning opener, or addressing track misalignment, each repair comes with its own set of challenges and costs.
  2. Extent of Damage: The severity of the damage directly affects the complexity of the repair and, consequently, the cost involved. Minor issues such as loose bolts or worn weatherstripping may require minimal time and resources to fix, while major structural damage or component failure may necessitate more extensive repairs or even replacement.
  3. Quality of Materials: The quality of materials used for repairs can also impact the overall cost. Opting for higher-quality components may incur a higher upfront expense but can result in greater durability and longevity, potentially reducing the need for future repairs.
  4. Labor Costs: Labor costs vary depending on factors such as the complexity of the repair, the experience and expertise of the technician, and local market rates. Complex repairs or emergency services may incur higher labor charges, so it’s essential to consider these factors when budgeting for garage door repair.
  5. Additional Services: In some cases, additional services may be required alongside the primary repair. This could include garage door maintenance, lubrication, or safety inspections, which can add to the overall cost but are essential for ensuring the long-term functionality and safety of your garage door system.

Common Garage Door Repairs and Their Costs:

Now that we have a better understanding of the factors influencing repair costs, let’s explore some common garage door issues and their associated expenses:

  1. Broken Springs: Broken garage door springs are a common issue that can significantly impact the functionality of your door. Repairing or replacing springs typically ranges from $150 to $350 per spring, depending on the type and size of the spring and whether both springs need replacement for balance.
  2. Panel Replacement: Damaged or dented garage door panels may require replacement to restore the door’s appearance and structural integrity. The cost of panel replacement varies based on factors such as the material, size, and design of the panel, ranging from $200 to $600 per panel.
  3. Opener Repair: Malfunctioning garage door openers can pose inconvenience and security risks. Repairing or replacing a garage door opener typically costs between $150 and $500, depending on the type of opener, the extent of the issue, and any additional features or accessories.
  4. Track Alignment: Misaligned or bent tracks can cause the garage door to operate improperly and may require professional adjustment or replacement. Track alignment services typically range from $100 to $200, depending on the severity of the misalignment and the complexity of the repair.
  5. Sensor Adjustment: Faulty or misaligned safety sensors can prevent the garage door from closing properly, posing safety hazards. Sensor adjustment or replacement typically costs between $50 and $150, including labor and materials.

Budgeting and Decision-Making:

When faced with garage door repair expenses, it’s essential to approach the situation thoughtfully and strategically. Consider the following tips for budgeting and decision-making:

  1. Get Multiple Quotes: Obtain estimates from multiple reputable garage door repair companies to compare prices and services. This allows you to make an informed decision and ensure you’re getting the best value for your money.
  2. Consider Long-Term Costs: While it may be tempting to opt for the cheapest repair option upfront, consider the long-term costs associated with quality and durability. Investing in higher-quality materials and professional services can save you money in the long run by reducing the need for frequent repairs and replacements.
  3. Explore Financing Options: If the cost of garage door repair exceeds your budget, inquire about financing options or payment plans offered by repair companies. Many providers offer flexible payment options to help homeowners manage unexpected expenses.
  4. Prioritize Safety: When assessing repair options, prioritize safety and functionality over cost savings. Addressing safety issues promptly can prevent accidents and injuries, ultimately saving you money and ensuring the well-being of your family and property.

Conclusion:

Overall, based from Garage Door Repair, navigating the costs of garage door repair can be challenging, but with careful consideration and planning, you can make informed decisions that protect your home, your budget, and your peace of mind. By understanding the factors influencing repair costs, exploring common repair expenses, and adopting prudent budgeting strategies, you can effectively manage garage door repair expenses and maintain the safety, functionality, and aesthetics of your garage door for years to come.

EDM Garage Doors, LLC

596 Richard Brown Blvd, Volo, IL 60073, United States

847-416-3036

Garage Door Opener Battery Backup: Do You Need It? – Don and Son’s Garage Doors

As a homeowner who has experienced the inconvenience of power outages, I’ve often wondered about the necessity of having a garage door opener battery backup. It’s one of those features that you don’t think about until you need it, but when the situation arises, you realize its importance.

In this article, I’ll share my personal insights and experiences regarding garage door opener battery backups, and explore whether they are truly essential for every home based from Garage Door Repair.

Let’s start by understanding the role of a garage door opener in our daily lives. For most of us, it’s a convenience that we rely on heavily. With just a push of a button, we can open or close our garage doors, allowing easy access to our vehicles and storage space. However, this convenience can quickly turn into frustration during power outages, leaving us unable to operate our garage doors.

This is where the garage door opener battery backup comes into play. Essentially, it’s a secondary power source that activates automatically when the main power supply is interrupted. This ensures that your garage door opener remains functional even when the electricity is out, allowing you to open and close your garage door safely and conveniently.

But do you really need a battery backup for your garage door opener? The answer to this question depends on several factors, including your location, lifestyle, and dependence on your garage door.

If you live in an area prone to frequent power outages due to storms, natural disasters, or infrastructure issues, a battery backup can be invaluable. I realized this firsthand when a severe storm knocked out power to my neighborhood for several hours. Without a battery backup, I would have been unable to access my garage, leaving my vehicle vulnerable to the elements and potential theft.

Even if power outages are less common in your area, the inconvenience they cause can still make a battery backup worthwhile. Imagine being late for work or an important appointment, only to find that you can’t leave your garage because the power is out. With a battery backup, such scenarios become a thing of the past, providing peace of mind and convenience when you need it most.

Moreover, a garage door opener battery backup can enhance home security by ensuring that your garage remains accessible during power outages. Without it, your garage door becomes a vulnerable entry point for intruders, especially if it’s connected to your home’s main power supply. A battery backup allows you to maintain control over who has access to your garage, even when the power is out.

Beyond security concerns, a battery backup can also prevent inconvenience and potential safety hazards associated with manually operating a garage door during a power outage. Trying to lift a heavy garage door manually can be challenging and risky, especially for elderly individuals or those with physical limitations. A battery backup eliminates the need for manual operation, providing a safer and more convenient alternative.

However, it’s essential to consider the cost and installation logistics of a garage door opener battery backup. While it may seem like an additional expense upfront, the benefits it provides in terms of convenience, security, and peace of mind can outweigh the initial investment. Many garage door opener models come with built-in battery backup options, making installation relatively straightforward for professional technicians.

In conclusion, as stated in Garage Door Repair, while a garage door opener battery backup may not be a necessity for every home, it can certainly provide valuable benefits in terms of convenience, security, and peace of mind. Whether you live in an area prone to power outages or simply value the added assurance of uninterrupted garage door operation, a battery backup is worth considering. As a homeowner who has experienced the benefits firsthand, I can attest to the importance of this feature and would highly recommend it to others looking to enhance their garage door system.

Don and Son’s Garage Doors

Coppell, TX

214-415-4109

How to Balance a Garage Door? – CCM Overhead Doors

As a homeowner, I’ve encountered my fair share of garage door woes, from creaks and groans to erratic movements that make me cringe every time I hit the button. One of the most common issues I’ve faced is an unbalanced garage door, which not only compromises its performance but also poses safety risks. After struggling to find a solution, I delved into the world of garage door maintenance and learned the ins and outs of achieving perfect balance.

By following Garage Door Repair, I’ll share my firsthand experience and provide a comprehensive guide to balancing a garage door, covering everything from identifying imbalance to adjusting springs and cables for smooth, reliable operation.

  1. Understanding the Importance of Garage Door Balance:Achieving proper balance is essential for the smooth and efficient operation of your garage door. A balanced door exerts minimal strain on the opener system, prolonging its lifespan and reducing the risk of premature wear and tear. Moreover, a balanced garage door operates more quietly and safely, minimizing the risk of accidents or injuries caused by sudden movements or malfunctions.
  2. Identifying Signs of Imbalance:Before diving into the balancing process, it’s crucial to identify whether your garage door is out of balance. Common signs of imbalance include:
    • The door feels heavy or difficult to lift manually.
    • The door does not stay in place when partially open but tends to fall or rise on its own.
    • The door makes unusual noises, such as grinding, scraping, or popping sounds, during operation.
    • The door exhibits uneven movement or jerky motion when opening or closing.
    If you notice any of these signs, it’s likely that your garage door is out of balance and in need of adjustment.
  3. Gathering the Necessary Tools and Materials:To balance your garage door effectively, you’ll need the following tools and materials:
    • Step ladder or sturdy platform
    • Safety gloves and goggles
    • Wrench set
    • Screwdriver set
    • Vice grips or locking pliers
    • Lubricant spray
    • Measuring tape
    • Pen and paper (for recording measurements)
    Before beginning the balancing process, ensure that you have all the necessary tools and materials on hand for a smooth and efficient operation.
  4. Locating the Torsion Spring System:In most residential garage doors, the torsion spring system is responsible for counterbalancing the weight of the door and facilitating smooth operation. Locate the torsion spring system, which is typically located above the garage door and mounted on a metal shaft. Exercise caution when working near the torsion spring system, as it is under high tension and can cause serious injury if mishandled.
  5. Testing the Balance of the Garage Door:Before making any adjustments, it’s essential to test the current balance of your garage door. Follow these steps to perform a balance test:
    1. Disconnect the garage door opener system by pulling the release cord or lever, allowing you to operate the door manually.
    2. Lift the door halfway open and release it gently, allowing it to remain in place without assistance.
    3. Repeat the process on the other side of the door to ensure consistency.
    4. If the door remains in place when partially open, it is properly balanced. If it tends to fall or rise on its own, it is out of balance and requires adjustment.
    By performing a balance test, you can determine whether your garage door needs adjustment and identify any areas of imbalance that require attention.
  6. Adjusting Torsion Spring Tension:If your garage door is out of balance, you’ll need to adjust the tension of the torsion springs to achieve proper balance. Follow these steps to adjust the tension:
    1. Use a winding bar to insert into one of the holes on the winding cone located at the end of the torsion spring shaft.
    2. Turn the winding bar in the direction specified by the manufacturer to increase or decrease tension, depending on the direction of imbalance.
    3. Use caution and apply gradual, incremental adjustments to avoid over-tightening the springs, which can cause damage or injury.
    4. Perform another balance test after each adjustment to evaluate the effectiveness and stability of the door’s movement.
    5. Repeat the adjustment process as needed until the door remains in place when partially open and exhibits smooth, even movement throughout its operation.
    Adjusting torsion spring tension requires precision and care to ensure safe and effective results. If you’re unsure or uncomfortable performing this task, consider hiring a professional garage door technician to handle the adjustment for you.
  7. Checking and Adjusting Cable Tension:In addition to torsion spring tension, it’s essential to check and adjust the tension of the lifting cables to ensure proper balance. Follow these steps to adjust cable tension:
    1. Locate the cable drums attached to the torsion spring shaft on each side of the door.
    2. Use a wrench to loosen the set screws securing the cable to the drum, allowing you to adjust the tension.
    3. Increase or decrease cable tension as needed by winding or unwinding the cable around the drum, ensuring an equal number of turns on each side for balance.
    4. Tighten the set screws securely once the desired tension is achieved, ensuring that the cable remains in place during operation.
    5. Perform a final balance test to confirm that the door remains in place when partially open and operates smoothly and evenly.
    Proper cable tension is essential for maintaining balance and stability in the garage door system. Ensure that the cables are adjusted correctly and securely to prevent accidents or malfunctions during operation.
  8. Lubricating Moving Parts:Once the garage door is properly balanced, it’s essential to lubricate the moving parts to ensure smooth and efficient operation. Apply a generous amount of lubricant spray to the torsion spring system, rollers, hinges, and tracks to reduce friction and prolong the lifespan of the components.
  9. Performing Regular Maintenance:Balancing your garage door is just one aspect of ongoing maintenance that is essential for optimal performance and longevity. Make it a habit to inspect and lubricate the moving parts regularly, check for signs of wear or damage, and address any issues promptly to prevent further damage or safety hazards.

Conclusion:

Overall, based from Garage Door Repair, balancing a garage door is a vital maintenance task that ensures smooth, safe, and efficient operation of the door system. By following the steps outlined in this guide and taking the time to adjust torsion spring tension and cable tension properly, you can achieve perfect balance and enjoy a quieter, more reliable garage door experience. Remember to exercise caution and seek professional assistance if you’re unsure or uncomfortable performing any aspect of the balancing process. With proper maintenance and care, your garage door will continue to serve you faithfully for years to come.

CCM Overhead Doors

1000 NW 80th St, Oklahoma City, OK 73114, United States

405-563-8982

How to Adjust LiftMaster Garage Door Opener – Camco Commercial Door Company

Understanding the Need for Adjustment

Before diving into the adjustment process, it’s essential to grasp why you might need to adjust your LiftMaster garage door opener. Over time, factors like weather changes, wear and tear, or improper installation can lead to misalignment or operational issues. Adjustments ensure smooth and efficient functioning, prolonging the opener’s lifespan.

Adjusting a LiftMaster garage door opener might seem daunting, but with the right guidance, it’s a manageable task.

Here’s how I do it based from Garage Door Repair.

Preparing for Adjustment

  1. Safety First: Before any adjustments, ensure the opener is unplugged to prevent accidental activation.
  2. Gather Tools: You’ll need a step ladder, a flathead screwdriver, a stepladder, and possibly a wrench, depending on your opener model.

Adjusting the Force Settings

  1. Locate Adjustment Screws: Most LiftMaster openers feature adjustment screws for both up and down force settings. These are usually found on the opener’s motor housing.
  2. Testing Force: With the opener plugged back in, initiate a test run. If the door doesn’t open or close smoothly, it might indicate excessive force or resistance.
  3. Adjustment Process: Using the flathead screwdriver, locate the force adjustment screws. Turning these screws clockwise increases force, while counterclockwise decreases it. Make small adjustments and test the door’s operation until it moves smoothly without excessive force.

Aligning the Safety Sensors

  1. Sensor Alignment: LiftMaster garage door openers are equipped with safety sensors mounted on either side of the door near the floor. Misalignment can prevent the door from closing properly.
  2. Checking Alignment: Observe the sensor indicator lights; if one or both are blinking, it indicates misalignment.
  3. Adjustment Steps: Loosen the sensor mounting brackets with a wrench or screwdriver. Gently adjust the sensors until both indicator lights become steady. Tighten the brackets to secure the sensors in place.

Limit Switch Adjustment

  1. Locating the Limit Switches: These switches determine the door’s opening and closing points. They’re typically found on the opener’s motor housing or near the track.
  2. Setting the Limits: With the opener activated, observe the door’s movement. If it doesn’t stop at the desired points, adjust the limit switches accordingly.
  3. Fine-Tuning: Make small adjustments to the limit switch settings until the door opens and closes fully without going past its intended limits.

Lubrication and Maintenance

  1. Regular Lubrication: Proper lubrication is crucial for smooth operation. Apply a silicone-based lubricant to the opener’s chain, tracks, and rollers.
  2. Visual Inspection: Periodically inspect the opener for worn or damaged parts. Replace any components showing signs of wear to prevent further issues.

Testing and Final Checks

  1. Test Run: After adjustments, perform several test runs to ensure the door operates smoothly and consistently.
  2. Safety Reassessment: Confirm that safety features such as auto-reverse and force sensitivity are functioning correctly.
  3. Secure Connections: Double-check all screws and connections to ensure they’re tightened securely.

Conclusion

Overall, based from Garage Door Repair, adjusting your LiftMaster garage door opener might seem intimidating at first, but with patience and attention to detail, it’s a task you can tackle yourself. By following these steps and performing regular maintenance, you’ll ensure your garage door opener operates smoothly and reliably for

Camco Commercial Door Company

Knoxville, TN

865-776-9455

5 Essential Tips for Greasing Your Garage Door: A Personal Guide – BH Garage Doors and Gates

As a homeowner who has dealt with the ins and outs of garage door maintenance, I understand the importance of proper lubrication. Greasing your garage door regularly not only ensures smooth operation but also helps prevent premature wear and tear on its components.

In reference to Garage Door Repair, I’ll share my personal insights and provide five essential tips to remember when greasing your garage door.

  1. Choose the Right Lubricant: Selecting the correct lubricant is crucial for effective garage door maintenance. Opt for a high-quality silicone-based or lithium-based garage door lubricant specifically designed for use on metal components. Avoid using oil-based lubricants, as they can attract dust and debris, leading to buildup and potentially causing damage to your garage door over time.
  2. Identify Key Areas for Lubrication: Before applying grease to your garage door, it’s essential to identify the key areas that require lubrication. Focus on the metal components that experience friction during the door’s operation, such as the rollers, hinges, tracks, springs, and bearings. Pay special attention to areas where metal meets metal, as these are prone to wear and may benefit from additional lubrication.
  3. Clean and Prepare the Surfaces: Proper preparation is key to ensuring that the lubricant adheres effectively to the metal surfaces of your garage door. Begin by cleaning the rollers, tracks, hinges, and other components using a mild detergent or solvent to remove dirt, grime, and old lubricant buildup. Once clean, dry the surfaces thoroughly with a clean cloth to ensure that no moisture remains before applying the new grease.
  4. Apply the Grease Sparingly: When applying grease to your garage door components, less is often more. Apply a small amount of lubricant to each roller, hinge, and track, focusing on the areas where friction occurs. Avoid over-greasing, as excess lubricant can attract dirt and debris, leading to buildup and potentially causing more harm than good. Use a rag or brush to distribute the grease evenly and remove any excess.
  5. Regular Maintenance is Key: Greasing your garage door should be part of your regular maintenance routine to ensure optimal performance and longevity. Make it a habit to inspect your garage door components periodically and reapply lubricant as needed, especially in high-friction areas. Regular maintenance not only keeps your garage door operating smoothly but also helps identify potential issues early, preventing costly repairs down the line.

Conclusion:

By following these five essential tips I got from Garage Door Repair for greasing your garage door, you can maintain its smooth operation and extend its lifespan. Remember to choose the right lubricant, identify key areas for lubrication, clean and prepare the surfaces properly, apply the grease sparingly, and make regular maintenance a priority. With these simple yet effective practices, you can keep your garage door in top condition for years to come, providing reliable access to your home and ensuring peace of mind for you and your family.

BH Garage Doors and Gates

Rockwall, TX

214-206-5231

How to Reprogram Wayne Dalton Garage Door Remote – All American Doors

As a homeowner with a Wayne Dalton garage door opener, knowing how to reprogram your remote control is essential for seamless access to your garage. Whether you’re replacing lost remotes or updating access codes for security, reprogramming your Wayne Dalton garage door remote ensures smooth operation and peace of mind.

In reference to Garage Door Repair, I’ll walk you through the process of reprogramming your Wayne Dalton garage door remote, step by step.

Understanding Your Wayne Dalton Garage Door Opener: Before delving into the reprogramming process, it’s essential to familiarize yourself with the components of your Wayne Dalton garage door opener. These typically include the main motor unit installed in your garage, wall-mounted control buttons, and the remote control devices.

Tools You’ll Need: Reprogramming your Wayne Dalton garage door remote requires minimal tools, making it accessible to most homeowners. Here’s what you’ll need:

  1. Wayne Dalton garage door remote control (existing or new)
  2. Stepladder (if necessary)
  3. Pen and paper (optional but helpful for recording access codes)

Step-by-Step Guide to Reprogramming Your Wayne Dalton Garage Door Remote: Follow these step-by-step instructions to reprogram your Wayne Dalton garage door remote:

  1. Access the Main Motor Unit: Begin by locating the main motor unit of your Wayne Dalton garage door opener. This unit is typically installed on the ceiling of your garage near the center of the door.
  2. Locate the Programming Button: On the main motor unit, you’ll find a small programming button. This button may be labeled “Learn,” “Program,” or “Set,” depending on the model of your Wayne Dalton opener. Consult your opener’s manual if you’re unsure.
  3. Press and Release the Programming Button: Using a stepladder if necessary, press and release the programming button on the main motor unit. You should see a small indicator light or hear a beep to indicate that the opener is ready to receive programming signals.
  4. Activate Programming Mode on the Remote: With the opener in programming mode, grab your Wayne Dalton garage door remote control. Press and hold the button you wish to program on the remote control. This could be the main button for opening and closing the door or additional buttons for other functions.
  5. Wait for Confirmation: As you continue holding down the button on the remote control, observe the indicator light on the main motor unit. You should see it flash or hear a beep, indicating that the programming was successful.
  6. Test the Remote Control: Once programmed, test the remote control to ensure it operates the garage door opener correctly. Stand within range of the opener and press the programmed button on the remote control. The door should open or close smoothly in response.
  7. Repeat for Additional Remotes (If Needed): If you have multiple remote controls or additional features to program, repeat the programming process for each one. Press and release the programming button on the main motor unit before programming each remote control.
  8. Record Access Codes (Optional): For your convenience, consider recording the access codes and remote control programming in a safe place. This ensures that you have easy access to this information in the future and can quickly reprogram your opener if needed.

Conclusion

Overall, in Garage Door Repair, reprogramming your Wayne Dalton garage door remote is a simple yet essential task that enhances the functionality and security of your garage. By following the step-by-step instructions outlined in this guide, you can confidently reprogram your remote control to suit your specific needs. Whether you’re adding new remotes, updating access codes, or enhancing security features, mastering the reprogramming process ensures smooth and efficient operation of your Wayne Dalton garage door opener for years to come. If you encounter any difficulties or have questions during the reprogramming process, consult your opener’s manual or reach out to Wayne Dalton customer support for assistance. With practice and familiarity, you’ll become adept at reprogramming your Wayne Dalton garage door remote whenever the need arises.

All American Doors

8155 NW 93rd St, Medley, FL 33166, United States

305-885-8088

Page 1 of 2

Powered by WordPress & Theme by Anders Norén