Insulated Window Installation for Enhanced Energy Efficiency – Windows and Siding North Texas

As a homeowner who’s always been conscious of energy consumption and its impact on both the environment and my wallet, I recently embarked on a journey to upgrade my windows with a focus on enhancing energy efficiency. After extensive research and consultations with experts, I decided to invest in insulated windows—a decision that has transformed not only the comfort and efficiency of my home but also my overall living experience.

By following Window Replacement, I’ll share my insights into the benefits of insulated window installation and the transformative impact it has had on my home.

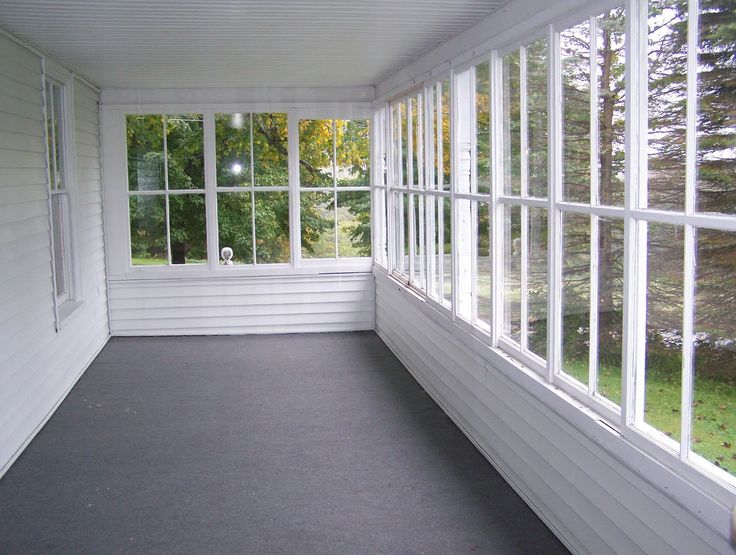
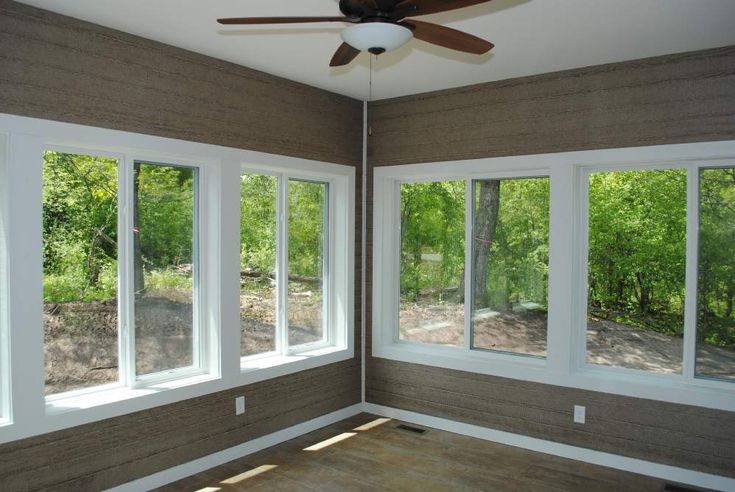
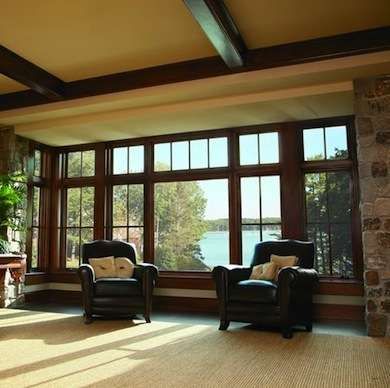
  1. Understanding Insulated Windows:Insulated windows, also known as double-glazed or thermal windows, feature multiple layers of glass separated by a space filled with insulating gas, typically argon or krypton. This design creates a thermal barrier that reduces heat transfer between the interior and exterior of the home, improving energy efficiency and indoor comfort. Additionally, insulated windows often feature low-emissivity (Low-E) coatings that further enhance thermal performance by reflecting infrared heat back into the home while allowing visible light to pass through.
  2. Benefits of Insulated Windows:
    • Improved Energy Efficiency: One of the primary benefits of insulated windows is their ability to minimize heat loss during the winter and heat gain during the summer. By reducing thermal transfer through the windows, insulated windows help maintain consistent indoor temperatures, reducing the workload on heating and cooling systems and lowering energy bills.
    • Enhanced Comfort: Insulated windows create a more comfortable indoor environment by minimizing drafts, cold spots, and temperature fluctuations near windows. With improved thermal insulation, homeowners can enjoy a more consistent and comfortable temperature throughout their living spaces, regardless of external weather conditions.
    • Noise Reduction: In addition to thermal insulation, insulated windows also offer acoustic benefits by reducing noise transmission from the outdoors. The multiple layers of glass and insulating gas help dampen sound waves, providing a quieter and more peaceful living environment, particularly in urban or noisy areas.
    • UV Protection: Many insulated windows feature Low-E coatings that block a significant portion of harmful ultraviolet (UV) rays from entering the home. This helps protect interior furnishings, flooring, and artwork from fading or damage caused by prolonged exposure to sunlight, preserving their appearance and value over time.
    • Condensation Control: Insulated windows are less prone to condensation buildup compared to single-pane windows, thanks to their improved thermal performance. By minimizing condensation on window surfaces, insulated windows help reduce the risk of mold growth, moisture damage, and indoor air quality issues.
  3. Installation Process:Installing insulated windows requires careful planning, precision, and attention to detail to ensure optimal performance and longevity. Here’s a step-by-step overview of the installation process:
    • Preparation: Begin by assessing the condition of existing windows and identifying any necessary repairs or modifications to the window openings. Clear the area around the windows and remove any obstacles or obstructions that may impede the installation process.
    • Measurement: Accurate measurements are crucial for ordering properly sized insulated windows that fit seamlessly within the existing openings. Measure the width, height, and depth of the window openings, taking into account any irregularities or structural considerations.
    • Weatherproofing: Install flashing tape or waterproof membrane around the perimeter of the window openings to create a moisture barrier and prevent water infiltration. Apply caulking or sealant to seal any gaps or joints between the window frame and the surrounding wall.
    • Installation: Carefully position the insulated windows within the openings, ensuring proper alignment and levelness. Use shims to adjust the level and plumb as needed, and secure the windows in place with screws or nails.
    • Insulation: Fill any gaps or voids between the window frame and the rough opening with spray foam insulation or fiberglass batts, ensuring a tight seal and optimal thermal performance.
    • Finishing Touches: Install exterior trim or casing to cover the gap between the window frame and the surrounding wall, providing a clean and finished appearance. Use paint or stain to match the trim to your home’s exterior aesthetics. Apply interior trim or casing to conceal any gaps or imperfections around the window frame and create a seamless transition between the window and the wall.
    • Testing and Adjustment: Test the operation of the insulated windows to ensure smooth opening and closing without any binding or sticking. Make any necessary adjustments to the hardware, seals, or alignment to achieve optimal performance.
  4. Conclusion: Overall, based from Window Replacement, upgrading to insulated windows has been a game-changer for me, transforming my home into a more energy-efficient, comfortable, and sustainable living space. From reduced energy bills to enhanced indoor comfort and peace of mind, the benefits of insulated window installation are undeniable. By understanding the advantages of insulated windows and following proper installation procedures, homeowners can enjoy long-lasting benefits and contribute to a greener, more efficient future.As I reflect on my journey to enhanced energy efficiency, I’m grateful for the decision to invest in insulated windows—a decision that has not only improved the performance and comfort of my home but also aligned with my values of sustainability and environmental stewardship. I encourage fellow homeowners to explore the benefits of insulated windows and consider them as a valuable investment in the long-term sustainability and comfort of their homes.

Windows and Siding North Texas

7901 Whispering Woods Ln ste a, North Richland Hills, TX 76182, United States

817-826-9010

Upgrading to Energy-Efficient Windows: Long-Term Savings – Denton Siding & Window Replacement

As I sit by the window, sipping on my morning coffee, I can’t help but notice the chill seeping in through the glass. It’s a familiar sensation during the colder months, one that prompts me to ponder the efficiency of my home’s windows.

Like many homeowners, I’ve often contemplated the idea of upgrading to energy-efficient windows, but the prospect of upfront costs has deterred me. However, as I delve deeper into the subject, I realize that the long-term savings and benefits far outweigh the initial investment as stated in Window Replacement.

  1. Understanding Energy Efficiency:Energy-efficient windows are designed to minimize heat transfer between the interior and exterior of a building, thereby reducing the need for heating and cooling. They achieve this through advanced technologies such as low-emissivity (low-E) coatings, multiple panes of glass, and gas fills between the panes. These features help to insulate the home, keeping it warmer in winter and cooler in summer, ultimately lowering energy consumption and utility bills.
  2. Calculating Potential Savings:While the upfront cost of upgrading to energy-efficient windows may seem daunting, it’s essential to consider the long-term savings they can provide. By reducing heating and cooling costs, energy-efficient windows can lead to significant savings on monthly utility bills. Additionally, many governments and utility companies offer incentives and rebates for installing energy-efficient upgrades, further offsetting the initial investment.
  3. Enhancing Comfort and Well-Being:Beyond financial savings, energy-efficient windows contribute to a more comfortable and sustainable living environment. By minimizing drafts and temperature fluctuations, they help maintain consistent indoor temperatures throughout the year, ensuring greater comfort for occupants. Moreover, energy-efficient windows often feature enhanced noise reduction capabilities, providing a quieter and more tranquil living space.
  4. Increasing Property Value:Upgrading to energy-efficient windows can also enhance the value of your home. In today’s environmentally conscious market, prospective buyers are increasingly prioritizing energy efficiency and sustainability when searching for properties. By investing in energy-efficient upgrades, homeowners can make their homes more attractive to potential buyers and command higher resale prices in the future.
  5. Promoting Environmental Sustainability:Opting for energy-efficient windows not only benefits homeowners financially but also contributes to environmental sustainability. Traditional windows are often a significant source of energy loss, leading to increased carbon emissions and environmental impact. By reducing energy consumption, energy-efficient windows help mitigate greenhouse gas emissions and combat climate change, making a positive contribution to the planet.
  6. Choosing the Right Windows:When considering an upgrade to energy-efficient windows, it’s essential to choose the right products for your specific needs and climate. Factors to consider include the window’s U-factor, solar heat gain coefficient (SHGC), and energy performance ratings. Consulting with a reputable window supplier or contractor can help you select windows that are tailored to your home’s requirements and maximize energy savings.
  7. Maximizing Efficiency with Proper Installation:Proper installation is critical to ensuring the optimal performance of energy-efficient windows. Even the most advanced windows can underperform if not installed correctly, leading to air leaks, condensation issues, and reduced efficiency. Hiring a qualified professional for the installation process is highly recommended, as they have the expertise and experience to ensure a proper fit and seal.
  8. Long-Term Investment in Sustainability:Upgrading to energy-efficient windows is not just a short-term fix but a long-term investment in sustainability and cost savings. While the initial investment may seem significant, the returns in terms of energy savings, comfort, property value, and environmental impact make it a worthwhile endeavor. By taking proactive steps to improve the energy efficiency of our homes, we can reduce our carbon footprint, lower our utility bills, and create a more sustainable future for generations to come.

In conclusion, by following Window Replacement, the decision to upgrade to energy-efficient windows is one that offers numerous benefits and opportunities for long-term savings. From reducing energy consumption and utility bills to enhancing comfort and property value, energy-efficient windows are a sound investment in both financial and environmental terms. By embracing sustainability and making informed choices, homeowners can create homes that are not only energy-efficient but also comfortable, resilient, and environmentally responsible.

Denton Siding & Window Replacement

1429 Ridgecrest Cir, Denton, TX 76205, United States

940-283-7300

Energy Efficiency Ratings and Labels for Windows – Arlington Siding & Window Replacement

As a homeowner who’s passionate about sustainability and saving on energy costs, I’ve come to understand the importance of choosing energy-efficient windows. Not only do they contribute to a more comfortable living environment, but they also help reduce utility bills and minimize our carbon footprint. However, navigating the world of energy efficiency ratings and labels for windows can be daunting.

In this comprehensive guide from Window Replacement Arlington TX, I’ll break down everything you need to know to make informed decisions when selecting energy-efficient windows for your home.

  1. Understanding Energy Efficiency Ratings: Energy efficiency ratings for windows are designed to help consumers identify products that meet specific performance standards. The two primary rating systems used in the United States are the U-factor and Solar Heat Gain Coefficient (SHGC). The U-factor measures the rate of heat transfer through the window, with lower values indicating better insulation. The SHGC measures the amount of solar heat that enters through the window, with lower values indicating better heat rejection.
  2. Interpreting Energy Performance Labels: Energy performance labels provide valuable information about a window’s energy efficiency ratings and help homeowners compare different products. Look for labels from organizations such as ENERGY STAR® or the National Fenestration Rating Council (NFRC), which provide standardized ratings for U-factor, SHGC, and other performance metrics. These labels typically include a numerical rating and may also feature additional information such as climate zone recommendations and energy-saving benefits.
  3. Choosing the Right Climate Zone: Climate zone recommendations on energy performance labels help homeowners select windows that are optimized for their specific climate. Different regions have varying heating and cooling requirements, so it’s essential to choose windows with appropriate energy efficiency ratings for your area. For example, windows with low U-factor ratings are ideal for colder climates, while windows with low SHGC ratings are more suitable for warmer climates.
  4. Balancing Performance and Cost: While energy-efficient windows offer long-term savings on energy costs, they may come with a higher upfront cost compared to standard windows. It’s essential to strike a balance between performance and cost when selecting windows for your home. Consider factors such as payback period, potential energy savings, and overall return on investment to determine the most cost-effective option for your budget and needs.
  5. Exploring Window Technologies: Advances in window technologies have led to the development of innovative features that enhance energy efficiency and performance. Look for windows with features such as low-emissivity (low-E) coatings, gas fills (such as argon or krypton), and insulated frames to improve thermal insulation and reduce heat transfer. These technologies help minimize energy loss and maximize comfort while lowering heating and cooling costs.
  6. Understanding Condensation Resistance: Condensation resistance is another important factor to consider when evaluating window performance. Condensation occurs when warm, moist air comes into contact with a cold surface, such as a window pane. Windows with higher condensation resistance ratings are less likely to experience condensation buildup, reducing the risk of mold, mildew, and moisture-related issues.
  7. Investigating Rebates and Incentives: Many utility companies, government agencies, and non-profit organizations offer rebates and incentives for energy-efficient home improvements, including windows. Take advantage of these programs to offset the cost of upgrading to energy-efficient windows and maximize your savings. Check with your local utility provider or visit websites such as ENERGY STAR® or the Database of State Incentives for Renewables & Efficiency (DSIRE) to explore available incentives in your area.
  8. Consulting with Professionals: If you’re unsure about which energy-efficient windows are best suited for your home, consider consulting with a professional. Window contractors, energy auditors, and certified professionals can provide expert advice and recommendations based on your specific needs and budget. They can also help assess your home’s energy performance and identify opportunities for improvement beyond window replacement.
  9. Considering Long-Term Benefits: While the initial cost of energy-efficient windows may be higher than standard windows, it’s essential to consider the long-term benefits and savings they offer. Energy-efficient windows can help reduce heating and cooling costs, improve indoor comfort, and enhance the value of your home. Additionally, they contribute to a more sustainable and environmentally friendly lifestyle by reducing energy consumption and greenhouse gas emissions.
  10. Maintaining Energy Efficiency: Once you’ve installed energy-efficient windows, it’s important to maintain their performance over time. Clean the glass regularly, inspect the frames for signs of wear or damage, and ensure proper sealing and insulation around the windows. Address any issues promptly to prevent energy loss and maintain optimal energy efficiency throughout the life of your windows.

In conclusion, according to Window Replacement Arlington TX, understanding energy efficiency ratings and labels for windows is essential for making informed decisions when selecting products for your home. By considering factors such as climate zone recommendations, performance metrics, cost-effectiveness, and available incentives, homeowners can choose windows that maximize energy savings, comfort, and sustainability. Whether you’re upgrading to reduce energy costs, enhance indoor comfort, or minimize environmental impact, energy-efficient windows offer a practical and cost-effective solution for improving the performance and efficiency of your home.

Arlington Siding & Window Replacement

1111 Honeysuckle Way, Arlington, TX 76011, United States

817-383-8681

How to Adjust LiftMaster Garage Door Opener – Camco Commercial Door Company

Understanding the Need for Adjustment

Before diving into the adjustment process, it’s essential to grasp why you might need to adjust your LiftMaster garage door opener. Over time, factors like weather changes, wear and tear, or improper installation can lead to misalignment or operational issues. Adjustments ensure smooth and efficient functioning, prolonging the opener’s lifespan.

Adjusting a LiftMaster garage door opener might seem daunting, but with the right guidance, it’s a manageable task.

Here’s how I do it based from Garage Door Repair.

Preparing for Adjustment

  1. Safety First: Before any adjustments, ensure the opener is unplugged to prevent accidental activation.
  2. Gather Tools: You’ll need a step ladder, a flathead screwdriver, a stepladder, and possibly a wrench, depending on your opener model.

Adjusting the Force Settings

  1. Locate Adjustment Screws: Most LiftMaster openers feature adjustment screws for both up and down force settings. These are usually found on the opener’s motor housing.
  2. Testing Force: With the opener plugged back in, initiate a test run. If the door doesn’t open or close smoothly, it might indicate excessive force or resistance.
  3. Adjustment Process: Using the flathead screwdriver, locate the force adjustment screws. Turning these screws clockwise increases force, while counterclockwise decreases it. Make small adjustments and test the door’s operation until it moves smoothly without excessive force.

Aligning the Safety Sensors

  1. Sensor Alignment: LiftMaster garage door openers are equipped with safety sensors mounted on either side of the door near the floor. Misalignment can prevent the door from closing properly.
  2. Checking Alignment: Observe the sensor indicator lights; if one or both are blinking, it indicates misalignment.
  3. Adjustment Steps: Loosen the sensor mounting brackets with a wrench or screwdriver. Gently adjust the sensors until both indicator lights become steady. Tighten the brackets to secure the sensors in place.

Limit Switch Adjustment

  1. Locating the Limit Switches: These switches determine the door’s opening and closing points. They’re typically found on the opener’s motor housing or near the track.
  2. Setting the Limits: With the opener activated, observe the door’s movement. If it doesn’t stop at the desired points, adjust the limit switches accordingly.
  3. Fine-Tuning: Make small adjustments to the limit switch settings until the door opens and closes fully without going past its intended limits.

Lubrication and Maintenance

  1. Regular Lubrication: Proper lubrication is crucial for smooth operation. Apply a silicone-based lubricant to the opener’s chain, tracks, and rollers.
  2. Visual Inspection: Periodically inspect the opener for worn or damaged parts. Replace any components showing signs of wear to prevent further issues.

Testing and Final Checks

  1. Test Run: After adjustments, perform several test runs to ensure the door operates smoothly and consistently.
  2. Safety Reassessment: Confirm that safety features such as auto-reverse and force sensitivity are functioning correctly.
  3. Secure Connections: Double-check all screws and connections to ensure they’re tightened securely.

Conclusion

Overall, based from Garage Door Repair, adjusting your LiftMaster garage door opener might seem intimidating at first, but with patience and attention to detail, it’s a task you can tackle yourself. By following these steps and performing regular maintenance, you’ll ensure your garage door opener operates smoothly and reliably for

Camco Commercial Door Company

Knoxville, TN

865-776-9455

5 Essential Tips for Greasing Your Garage Door: A Personal Guide – BH Garage Doors and Gates

As a homeowner who has dealt with the ins and outs of garage door maintenance, I understand the importance of proper lubrication. Greasing your garage door regularly not only ensures smooth operation but also helps prevent premature wear and tear on its components.

In reference to Garage Door Repair, I’ll share my personal insights and provide five essential tips to remember when greasing your garage door.

  1. Choose the Right Lubricant: Selecting the correct lubricant is crucial for effective garage door maintenance. Opt for a high-quality silicone-based or lithium-based garage door lubricant specifically designed for use on metal components. Avoid using oil-based lubricants, as they can attract dust and debris, leading to buildup and potentially causing damage to your garage door over time.
  2. Identify Key Areas for Lubrication: Before applying grease to your garage door, it’s essential to identify the key areas that require lubrication. Focus on the metal components that experience friction during the door’s operation, such as the rollers, hinges, tracks, springs, and bearings. Pay special attention to areas where metal meets metal, as these are prone to wear and may benefit from additional lubrication.
  3. Clean and Prepare the Surfaces: Proper preparation is key to ensuring that the lubricant adheres effectively to the metal surfaces of your garage door. Begin by cleaning the rollers, tracks, hinges, and other components using a mild detergent or solvent to remove dirt, grime, and old lubricant buildup. Once clean, dry the surfaces thoroughly with a clean cloth to ensure that no moisture remains before applying the new grease.
  4. Apply the Grease Sparingly: When applying grease to your garage door components, less is often more. Apply a small amount of lubricant to each roller, hinge, and track, focusing on the areas where friction occurs. Avoid over-greasing, as excess lubricant can attract dirt and debris, leading to buildup and potentially causing more harm than good. Use a rag or brush to distribute the grease evenly and remove any excess.
  5. Regular Maintenance is Key: Greasing your garage door should be part of your regular maintenance routine to ensure optimal performance and longevity. Make it a habit to inspect your garage door components periodically and reapply lubricant as needed, especially in high-friction areas. Regular maintenance not only keeps your garage door operating smoothly but also helps identify potential issues early, preventing costly repairs down the line.

Conclusion:

By following these five essential tips I got from Garage Door Repair for greasing your garage door, you can maintain its smooth operation and extend its lifespan. Remember to choose the right lubricant, identify key areas for lubrication, clean and prepare the surfaces properly, apply the grease sparingly, and make regular maintenance a priority. With these simple yet effective practices, you can keep your garage door in top condition for years to come, providing reliable access to your home and ensuring peace of mind for you and your family.

BH Garage Doors and Gates

Rockwall, TX

214-206-5231

How to Reprogram Wayne Dalton Garage Door Remote – All American Doors

As a homeowner with a Wayne Dalton garage door opener, knowing how to reprogram your remote control is essential for seamless access to your garage. Whether you’re replacing lost remotes or updating access codes for security, reprogramming your Wayne Dalton garage door remote ensures smooth operation and peace of mind.

In reference to Garage Door Repair, I’ll walk you through the process of reprogramming your Wayne Dalton garage door remote, step by step.

Understanding Your Wayne Dalton Garage Door Opener: Before delving into the reprogramming process, it’s essential to familiarize yourself with the components of your Wayne Dalton garage door opener. These typically include the main motor unit installed in your garage, wall-mounted control buttons, and the remote control devices.

Tools You’ll Need: Reprogramming your Wayne Dalton garage door remote requires minimal tools, making it accessible to most homeowners. Here’s what you’ll need:

  1. Wayne Dalton garage door remote control (existing or new)
  2. Stepladder (if necessary)
  3. Pen and paper (optional but helpful for recording access codes)

Step-by-Step Guide to Reprogramming Your Wayne Dalton Garage Door Remote: Follow these step-by-step instructions to reprogram your Wayne Dalton garage door remote:

  1. Access the Main Motor Unit: Begin by locating the main motor unit of your Wayne Dalton garage door opener. This unit is typically installed on the ceiling of your garage near the center of the door.
  2. Locate the Programming Button: On the main motor unit, you’ll find a small programming button. This button may be labeled “Learn,” “Program,” or “Set,” depending on the model of your Wayne Dalton opener. Consult your opener’s manual if you’re unsure.
  3. Press and Release the Programming Button: Using a stepladder if necessary, press and release the programming button on the main motor unit. You should see a small indicator light or hear a beep to indicate that the opener is ready to receive programming signals.
  4. Activate Programming Mode on the Remote: With the opener in programming mode, grab your Wayne Dalton garage door remote control. Press and hold the button you wish to program on the remote control. This could be the main button for opening and closing the door or additional buttons for other functions.
  5. Wait for Confirmation: As you continue holding down the button on the remote control, observe the indicator light on the main motor unit. You should see it flash or hear a beep, indicating that the programming was successful.
  6. Test the Remote Control: Once programmed, test the remote control to ensure it operates the garage door opener correctly. Stand within range of the opener and press the programmed button on the remote control. The door should open or close smoothly in response.
  7. Repeat for Additional Remotes (If Needed): If you have multiple remote controls or additional features to program, repeat the programming process for each one. Press and release the programming button on the main motor unit before programming each remote control.
  8. Record Access Codes (Optional): For your convenience, consider recording the access codes and remote control programming in a safe place. This ensures that you have easy access to this information in the future and can quickly reprogram your opener if needed.

Conclusion

Overall, in Garage Door Repair, reprogramming your Wayne Dalton garage door remote is a simple yet essential task that enhances the functionality and security of your garage. By following the step-by-step instructions outlined in this guide, you can confidently reprogram your remote control to suit your specific needs. Whether you’re adding new remotes, updating access codes, or enhancing security features, mastering the reprogramming process ensures smooth and efficient operation of your Wayne Dalton garage door opener for years to come. If you encounter any difficulties or have questions during the reprogramming process, consult your opener’s manual or reach out to Wayne Dalton customer support for assistance. With practice and familiarity, you’ll become adept at reprogramming your Wayne Dalton garage door remote whenever the need arises.

All American Doors

8155 NW 93rd St, Medley, FL 33166, United States

305-885-8088

How to Restore Garage Door? – A 24 Hour Door Service

As a homeowner, I’ve come to appreciate the vital role that a garage door plays in safeguarding my property and enhancing its curb appeal. However, like any other component of a home, garage doors are subject to wear and tear over time, necessitating occasional restoration to maintain their functionality and aesthetic appeal. Inspired by a desire to revitalize my garage door and restore its former glory, I embarked on a personal journey of discovery and renewal.

In this article, I share the insights, challenges, and triumphs that accompanied my quest to restore my garage door to its pristine condition as stated in Garage Door Repair.

Assessing the Scope of Restoration: Setting the Stage for Success

Before diving into the restoration process, I began by conducting a comprehensive assessment of my garage door’s condition. I carefully inspected its exterior surfaces for signs of damage, such as dents, scratches, or peeling paint, and assessed its operational components, including hinges, rollers, and springs, for wear and tear. By taking stock of the areas requiring attention and identifying any underlying issues affecting the door’s functionality, I gained a clear understanding of the scope of restoration needed and set realistic expectations for the project ahead.

Developing a Restoration Plan: Charting a Course for Renewal

Armed with a thorough assessment of my garage door’s condition, I proceeded to develop a detailed restoration plan tailored to address its specific needs. I prioritized tasks based on urgency and importance, focusing on repairs that would enhance both the door’s appearance and performance. For cosmetic issues such as dents or scratches, I researched effective repair techniques, such as dent removal or patching, to restore the door’s smooth and uniform surface. Additionally, I identified any mechanical issues affecting the door’s operation, such as misaligned tracks or worn-out springs, and devised strategies to address them effectively. By mapping out a step-by-step plan of action, I ensured a systematic and organized approach to the restoration process, minimizing guesswork and maximizing efficiency.

Gathering the Necessary Tools and Materials: Equipping Myself for Success

With a solid restoration plan in place, I turned my attention to gathering the tools and materials needed to execute the project effectively. Depending on the nature of the restoration tasks involved, I assembled a comprehensive toolkit comprising a variety of tools, including:

  1. Screwdrivers and wrenches: Essential for removing hardware components such as hinges, handles, and brackets.
  2. Paint scrapers and sandpaper: Used to remove old paint or surface imperfections and prepare the door for refinishing.
  3. Paintbrushes and rollers: For applying primer, paint, or sealant to the door’s surface.
  4. Replacement parts: Including hinges, rollers, springs, and weatherstripping, as needed to address mechanical issues.
  5. Safety equipment: Such as goggles, gloves, and ear protection, to ensure a safe and comfortable working environment.

By ensuring that I had the necessary tools and materials on hand before beginning the restoration process, I minimized interruptions and delays, allowing for seamless progress toward my goal of revitalizing my garage door.

Executing the Restoration Plan: Turning Vision into Reality

With my toolkit assembled and my restoration plan in hand, I set to work bringing my vision for the garage door to life. I began by tackling cosmetic issues such as dents, scratches, or surface damage, employing techniques such as sanding, patching, or repainting to restore the door’s exterior to its original condition. For mechanical issues affecting the door’s operation, I carefully disassembled and inspected the affected components, identifying any worn-out or damaged parts requiring replacement. With new hardware in hand, I reassembled the door, ensuring proper alignment and smooth operation. Throughout the restoration process, I remained attentive to detail, taking care to address each issue with precision and care, and maintaining a sense of patience and perseverance in the face of challenges.

Celebrating the Results: Reflecting on a Job Well Done

As I stood back and admired the fruits of my labor, a sense of satisfaction washed over me. Through careful planning, diligent execution, and a steadfast commitment to excellence, I had successfully restored my garage door to its former glory. Gone were the dents, scratches, and mechanical issues that had plagued it before; in their place stood a door that was not only visually appealing but also fully functional and reliable. With each passing day, I found renewed pride in the appearance of my home and a deep sense of accomplishment in knowing that I had taken proactive steps to preserve and enhance its value. In the end, the restoration of my garage door served as a testament to the power of determination, resourcefulness, and a willingness to roll up one’s sleeves and get the job done.

In conclusion, as stated in Garage Door Repair, restoring a garage door is a rewarding endeavor that allows homeowners to breathe new life into a vital component of their property. By following a systematic approach and drawing on a combination of skill, knowledge, and creativity, homeowners can address both cosmetic and mechanical issues affecting their garage doors and restore them to optimal condition. Whether tackling minor repairs or embarking on a full-scale restoration project, the key lies in careful planning, attention to detail, and a willingness to embrace the challenges and opportunities that arise along the way. With dedication and perseverance, homeowners can transform their garage doors from tired and worn to vibrant and functional, enhancing the overall appearance and value of their homes in the process.

A 24 Hour Door Service

417 Post Oak Cove, Madison, MS 39110, United States

601-664-8935

Soundproofing Your Garage: Insulation and Installation Tips – Little Elm Gates & Garage Door Repair

As a homeowner who values a peaceful living environment, the decision to transform my garage into a quiet, insulated space was a game-changer. Whether it’s converting the garage into a home office, gym, or simply a serene retreat, soundproofing is a key element in creating a comfortable and private oasis.

By following Garage Door Repair, I’ll share my experiences and insights into the world of soundproofing, offering valuable tips on insulation and installation to help you turn your garage into a quiet haven.

Understanding the Need for Soundproofing

The garage, often relegated to a storage space or a parking spot for vehicles, has immense untapped potential. By soundproofing the garage, you can unlock new possibilities and uses for this versatile area. Common reasons for soundproofing the garage include:

  1. Home Office or Studio: Many individuals are now opting to work from home or pursue creative endeavors in a quiet space. Soundproofing the garage allows for the creation of a home office or studio without the disturbances of external noise.
  2. Home Gym: Transforming your garage into a personal gym is a fantastic idea, but the clanging of weights and exercise equipment can be disruptive. Soundproofing ensures that your workout sessions won’t disturb the rest of the household.
  3. Entertainment Area: If you dream of a home theater or a cozy entertainment space, soundproofing is essential to enjoy movies, music, or gaming without disturbing others.

Essential Insulation Tips for Soundproofing Your Garage

Soundproofing your garage involves creating a barrier that absorbs, reflects, or dampens sound waves. Here are essential insulation tips to achieve optimal results:

1. Evaluate the Current Insulation:

  • Assess the existing insulation in your garage, if any. Older garages may lack proper insulation, making them more susceptible to sound transmission. Consider upgrading or supplementing the existing insulation.

2. Insulate Garage Doors:

  • Garage doors are often a significant source of sound transmission. Insulate them with materials such as foam board, fiberglass, or reflective insulation to create a barrier against external noise.

3. Seal Gaps and Cracks:

  • Sound can easily travel through gaps and cracks in walls, doors, and windows. Use weatherstripping, caulk, or foam sealant to seal any openings, preventing sound leakage.

4. Install Acoustic Panels:

  • Acoustic panels are designed to absorb sound waves, reducing echoes and reverberations. Install these panels on the walls and ceiling of your garage to enhance sound absorption.

5. Consider Double Drywall:

  • Adding an extra layer of drywall to the walls can significantly improve soundproofing. Use a damping adhesive between the layers to minimize vibrations and enhance the barrier against sound transmission.

6. Use Mass-Loaded Vinyl (MLV):

  • Mass-loaded vinyl is a dense, thin rubber-like material that adds mass to walls, reducing sound transmission. Install MLV on walls, ceilings, and even floors for effective soundproofing.

7. Insulate the Ceiling:

  • If your garage has an exposed ceiling, consider adding insulation to minimize sound transfer between floors. Use fiberglass or foam board insulation between joists, and cover with drywall if desired.

8. Invest in Quality Flooring:

  • The garage floor can be a source of impact noise. Use dense materials like rubber mats or acoustic underlayment to absorb impact and reduce the transmission of sound.

9. Upgrade Windows:

  • If your garage has windows, they can be weak points for sound transmission. Upgrade to double-pane windows with insulating properties or add heavy curtains to absorb sound.

10. Build a Stud Wall:

  • For enhanced soundproofing, consider building a stud wall within the existing walls. Fill the space between the studs with insulation and cover with drywall, creating an additional barrier.

DIY Soundproofing Installation Tips

Executing the soundproofing plan requires careful attention to detail. Here are DIY installation tips to ensure an effective and successful soundproofing project:

1. Safety First:

  • Always prioritize safety. Use appropriate safety gear, such as gloves and goggles, when handling insulation materials, and ensure proper ventilation in the garage.

2. Plan and Measure:

  • Before purchasing materials, plan the layout of your soundproofing project. Measure the dimensions of the garage accurately to determine the quantity of insulation, drywall, and other materials needed.

3. Start with Garage Doors:

  • Begin your soundproofing project by addressing the garage doors. Install weatherstripping, apply insulation, and consider adding mass-loaded vinyl to create a sound barrier.

4. Seal Gaps and Cracks:

  • Thoroughly inspect the garage for gaps and cracks. Seal these openings with weatherstripping, caulk, or foam sealant to prevent sound leaks.

5. Insulate Walls:

  • If adding an extra layer of drywall, apply damping adhesive to one side of the new drywall before installation. Secure the new drywall to the existing wall with screws, ensuring a tight fit.

6. Install Acoustic Panels:

  • Position acoustic panels strategically on the walls and ceiling. Follow the manufacturer’s instructions for proper installation to maximize sound absorption.

7. Consider Mass-Loaded Vinyl:

  • Cut mass-loaded vinyl to fit the desired areas, such as walls or ceiling. Install it directly onto the surface or sandwich it between layers of drywall for added mass and soundproofing.

8. Insulate the Ceiling:

  • Install fiberglass or foam board insulation between ceiling joists. Secure the insulation with appropriate supports, and cover with drywall if desired.

9. Upgrade Windows:

  • If replacing windows, choose double-pane windows with insulating properties. Alternatively, add heavy curtains or drapes to existing windows to minimize sound transmission.

10. Monitor and Adjust:

  • After completing the soundproofing project, regularly monitor the garage for any signs of sound leakage. Make adjustments as needed, such as adding more insulation or sealing any new gaps that may develop.

Conclusion: Crafting Your Tranquil Retreat

Soundproofing your garage is a rewarding DIY project that transforms the space into a haven of tranquility. Whether you’re creating a home office, gym, or entertainment area, the benefits of soundproofing extend beyond noise reduction to encompass comfort, privacy, and a sense of serenity.

Overall, as stated in Garage Door Repair, by understanding the importance of insulation, implementing effective techniques, and following careful installation tips, you can turn your garage into a space that seamlessly integrates with your lifestyle. Embrace the transformative power of soundproofing, and revel in the quiet retreat you’ve created within the walls of your own home.

Little Elm Gates & Garage Door Repair

14809 Lone Spring Dr, Little Elm, TX 75068, United States

972-597-8816

Impact-Resistant Garage Doors: Enhancing Home Safety – Del Mar Garage & Overhead Doors

As a homeowner deeply invested in the safety and security of my dwelling, the quest for fortifying every facet of my home led me to the realm of impact-resistant garage doors. Beyond their aesthetic appeal, these sturdy doors serve as silent guardians, standing resilient against the forces of nature and potential intruders.

In reference to Garage Door Repair, I delve into the intricacies of impact-resistant garage doors, unraveling their benefits and the profound impact they have on enhancing the safety and security of my home.

1. The Unseen Threats: Understanding the Need for Impact Resistance

Before delving into the features of impact-resistant garage doors, it’s crucial to recognize the potential threats they guard against. Homes, particularly those in regions prone to severe weather conditions, face the risk of impact from:

  • Hurricanes and Storms: High winds and flying debris during hurricanes and storms pose a significant threat to the structural integrity of garage doors.
  • Hailstorms: Hailstones, propelled by strong winds, can inflict substantial damage on traditional garage doors, compromising their functionality and safety.
  • Burglary Attempts: In addition to natural disasters, garage doors are susceptible to forced entry attempts. Impact-resistant doors act as a formidable barrier against such intrusion attempts.

2. The Anatomy of Resilience: Materials and Construction

The resilience of impact-resistant garage doors stems from their robust materials and construction. These doors are typically crafted using:

  • Reinforced Steel: The core material of impact-resistant garage doors is often reinforced steel. This provides strength and durability, creating a solid barrier against external forces.
  • Impact-Resistant Glass: Some models feature impact-resistant glass panels. This specialized glass is designed to withstand the impact of debris without shattering, maintaining the door’s integrity.
  • Sturdy Frame Construction: The frame of an impact-resistant garage door is meticulously constructed to enhance its structural integrity. This includes reinforced joints and strategically placed braces to withstand the forces of impact.

3. Weathering the Storm: Hurricane-Ready Features

For homeowners in hurricane-prone regions, impact-resistant garage doors offer a set of hurricane-ready features, ensuring their ability to weather the storm:

  • High Wind Resistance: Impact-resistant garage doors are engineered to withstand high wind speeds associated with hurricanes. This prevents the door from being blown inwards, safeguarding the garage and the home’s interior.
  • Debris Protection: The impact-resistant glass, if incorporated, is designed to resist penetration by airborne debris. This feature prevents shards of glass from entering the home during a storm, maintaining a safe environment for residents.
  • Sealed Design: To prevent water infiltration, impact-resistant garage doors often feature a sealed design. This minimizes the risk of water damage to the garage and its contents during heavy rainfall.

4. Beyond the Storm: Year-Round Security

While the hurricane-ready features are crucial, impact-resistant garage doors offer year-round security benefits that extend beyond storm season:

  • Burglary Deterrence: The robust construction of impact-resistant doors acts as a deterrent to burglars. Attempting to force entry through these doors becomes a formidable challenge, discouraging potential intruders.
  • Durability in Adverse Conditions: Impact-resistant garage doors exhibit durability in various adverse conditions, including extreme temperatures, humidity, and exposure to the elements. This durability contributes to the door’s longevity and reliability.

5. Financial Resilience: Minimizing Repair and Replacement Costs

Investing in impact-resistant garage doors is not just a commitment to safety; it’s a strategic move to minimize potential financial burdens. The resilience of these doors translates into:

  • Reduced Repair Costs: The robust construction of impact-resistant doors minimizes the likelihood of damage during storms or break-in attempts. This translates into fewer repair costs compared to traditional doors that may succumb to such challenges.
  • Long-Term Savings: The longevity of impact-resistant garage doors ensures long-term savings. With minimal susceptibility to wear and tear, these doors require less frequent replacements, providing a cost-effective solution over time.

6. Energy Efficiency: A Surprising Bonus

Beyond their primary role as guardians of safety, impact-resistant garage doors contribute to the energy efficiency of the home:

  • Insulation Properties: The construction of impact-resistant doors often includes insulation materials, enhancing the door’s energy efficiency. This contributes to temperature regulation within the garage, which can impact the overall energy efficiency of the home.
  • Potential Energy Savings: By maintaining a more stable temperature in the garage, impact-resistant doors can contribute to energy savings. This is particularly relevant if the garage is connected to the home or if it serves as a space for activities that benefit from climate control.

7. Elevating Curb Appeal: Aesthetics and Versatility

While the primary focus of impact-resistant garage doors is on safety and functionality, they do not compromise on aesthetics. These doors offer:

  • Design Variety: Impact-resistant garage doors come in a variety of designs, styles, and finishes. This allows homeowners to choose a door that not only enhances safety but also complements the architectural aesthetics of their home.
  • Curb Appeal: The visual impact of a well-designed and aesthetically pleasing impact-resistant door elevates the overall curb appeal of the home. It becomes a focal point that blends seamlessly with the exterior, enhancing the property’s visual appeal.

8. Installation Considerations: Professional Expertise for Optimal Performance

While impact-resistant garage doors are designed to withstand significant forces, their proper installation is crucial for optimal performance. Considerations for installation include:

  • Professional Installation: Engaging the services of professional installers ensures that the impact-resistant garage door is installed according to manufacturer specifications. This includes precise alignment, secure attachment, and proper integration with the garage door opener.
  • Compatibility with Garage Door Opener: Confirming compatibility with the existing garage door opener is essential. Some impact-resistant doors may require specific openers to ensure seamless operation.
  • Regular Maintenance: Despite their resilience, impact-resistant garage doors benefit from regular maintenance. This includes lubricating moving parts, inspecting seals, and ensuring that the door remains in optimal condition.

Conclusion: A Fortress of Safety and Peace of Mind

As I embraced the installation of impact-resistant garage doors, I found myself not just fortifying the physical structure of my home but creating a fortress of safety and peace of mind. These doors, with their robust construction and hurricane-ready features, stand as sentinels against the unseen threats of storms and potential intruders. The financial resilience, energy efficiency, and aesthetic appeal they bring to the table are unexpected bonuses in the realm of home fortification.

Overall, based from Garage Door Repair, in investing in impact-resistant garage doors, I discovered a harmonious blend of functionality and aesthetics—a testament to the evolving landscape of home safety solutions. Beyond their physical strength, these doors symbolize a commitment to the well-being of my home and its occupants. As guardians of safety, impact-resistant garage doors exemplify the fusion of innovation, resilience, and peace of mind in the sanctuary I call home.

Del Mar Garage & Overhead Doors

2668 Del Mar Heights Rd B, Del Mar, CA 92014, United States

858-304-8873

Common Signs of a Worn-Out Garage Door Spring – El Cajon Overhead & Garage Doors

As a vigilant homeowner, I’ve come to appreciate the symphony of daily life—a seamless orchestration where each component plays a crucial role. However, when the familiar hum of my garage door transformed into an unsettling cacophony, I realized that one often-overlooked maestro was nearing the end of its performance—the garage door spring.

In this exploration, join me as I decode the common signs of a worn-out garage door spring, unraveling the intricacies of its lifespan and the imperative of timely intervention by following Garage Door Repair.

1. The Unsung Hero: Understanding the Role of Garage Door Springs

Before diving into the signs of wear, it’s essential to comprehend the pivotal role that garage door springs play in the overall functionality of this seemingly mundane yet essential component. Garage doors, whether manual or automatic, are equipped with either extension springs or torsion springs, both serving the purpose of counterbalancing the weight of the door. This counterbalance is crucial for smooth opening and closing operations, effectively making the door feel lighter and more manageable.

2. The Ticker of Time: Recognizing the Lifespan of Garage Door Springs

Like any mechanical component, garage door springs have a finite lifespan, typically measured in cycles. A cycle is counted each time the door completes one full opening and closing movement. The average lifespan of garage door springs ranges from 10,000 to 20,000 cycles, depending on factors such as usage frequency, quality of the springs, and environmental conditions. Understanding the lifespan serves as a compass in deciphering the signs of wear and anticipating the need for replacement.

3. The Early Warning Symphony: Signs of Worn-Out Garage Door Springs

As my garage door springs approached the end of their lifecycle, they sounded an early warning symphony through subtle yet discernible signs. Recognizing these signs became pivotal in preempting potential malfunctions and ensuring the safety and efficiency of my garage door. Here are the common signals that your garage door springs might be nearing the end of their service:

  • Visible Wear and Tear: One of the most apparent signs is visible wear and tear on the springs. Look for signs of rust, corrosion, or elongation of the coils. These visual cues often indicate that the springs are losing their structural integrity.
  • Sagging or Imbalanced Door: If your garage door appears uneven when opening or closing, with one side lagging behind the other, it could be a sign of imbalanced springs. Imbalance is a clear indication that one or both springs are no longer providing adequate counterbalance.
  • Sluggish Movement: A once-smooth operation that transforms into a sluggish, jerky movement is a telltale sign of worn-out springs. As the springs lose their tension, the door’s movement becomes less controlled and more erratic.
  • Loud Noises During Operation: Unusual and loud noises, such as creaking, popping, or banging, are often indicators of spring fatigue. These noises result from the increased stress on the springs as they struggle to support the weight of the door.
  • Delayed Response to Commands: If your garage door exhibits a delayed response when opening or closing, it may be a sign that the springs are losing their ability to provide the necessary force for swift and efficient movement.
  • Cables and Pulleys Showing Wear: Inspect the cables and pulleys connected to the springs. If you notice fraying, wear, or damage, it’s an indication that the springs are no longer distributing the load evenly, leading to increased strain on these components.

4. The DIY Prelude: Simple Checks and Visual Inspections

Before delving into the process of spring replacement, I conducted a DIY prelude to assess the condition of my garage door springs. These preliminary checks provided valuable insights and confirmed the need for further inspection. Here’s a simple DIY prelude to gauge the health of your garage door springs:

  • Visual Inspection: Begin with a visual inspection of the springs. Look for any signs of rust, corrosion, or elongation. Pay attention to the overall condition of the coils and assess whether they appear symmetrical.
  • Operational Test: Test the garage door’s operation by manually opening and closing it. Observe the movement for any jerky or uneven behavior. Listen for unusual noises, and note whether the door feels heavier than usual.
  • Cable and Pulley Examination: Inspect the cables and pulleys connected to the springs. Check for any fraying, wear, or damage. These components work in tandem with the springs, and their condition is indicative of the overall health of the system.
  • Balance Check: Disconnect the automatic opener (if applicable) and manually operate the door to the halfway position. A balanced door should remain in this position without rising or falling. If the door moves, it’s a sign of imbalanced springs.

5. The Professional Crescendo: Knowing When to Seek Expert Intervention

While DIY checks provide valuable insights, there are instances where professional intervention becomes necessary. Garage door springs operate under high tension, and attempting to replace them without the proper knowledge and tools can pose safety risks. Here are scenarios where seeking the expertise of a garage door technician is advisable:

  • Visible Signs of Wear: If your visual inspection reveals visible signs of wear, such as rust, corrosion, or elongation, it’s crucial to consult a professional for a comprehensive assessment. They can determine whether the springs are still within a safe operating range or if replacement is imminent.
  • Imbalanced Door: If your garage door is noticeably imbalanced, with one side lagging behind or leading the other, it indicates a significant issue with the springs. Attempting to correct this imbalance without the proper expertise can lead to further damage and safety hazards.
  • Loud or Unusual Noises: Persistent loud noises during garage door operation are often indicative of spring fatigue. A garage door technician can diagnose the specific issue, recommend the appropriate course of action, and ensure a safe and effective solution.
  • Jerky or Sluggish Movement: If your garage door exhibits jerky or sluggish movement, especially after conducting a balance check and visual inspection, it’s advisable to seek professional assistance. These symptoms may point to a compromised spring system.
  • Safety Concerns: If you have concerns about the safety of your garage door or if there’s any doubt about the condition of the springs, err on the side of caution and consult a professional. Safety should always be a top priority when dealing with garage door components.

6. The Replacement Sonata: What to Expect During Spring Replacement

Embracing the inevitability of spring replacement, I embarked on a journey of understanding the process and what to expect during this essential maintenance task. Here’s a breakdown of the typical steps involved in garage door spring replacement:

  • Professional Assessment: A qualified garage door technician begins by conducting a thorough assessment of the garage door system. This includes inspecting the springs, cables, pulleys, and other related components. The technician will determine the type of springs installed and their specific specifications.
  • Spring Selection: Based on the assessment, the technician selects replacement springs that match the specifications of the existing ones. This ensures a seamless integration into the garage door system and maintains the necessary counterbalance.
  • Safety Precautions: Before commencing with the replacement, the technician takes necessary safety precautions. This often involves securing the garage door in the open position to release tension from the springs. Safety equipment, such as gloves and protective eyewear, is worn throughout the process.
  • Spring Removal: The worn-out springs are carefully removed from the garage door system. This may involve loosening and unwinding tension from torsion springs or detaching extension springs. The process requires precision and expertise to prevent injuries and damage.
  • Installation of New Springs: The replacement springs are installed, ensuring that they match the specifications of the original ones. The technician carefully winds torsion springs or secures extension springs in place, maintaining the necessary tension for optimal counterbalance.
  • Balancing and Testing: Once the new springs are in place, the technician balances the garage door to ensure even weight distribution. This involves making adjustments to the tension settings and conducting thorough tests to verify the smooth operation of the door.
  • Lubrication and Maintenance: As part of the replacement process, the technician may apply lubrication to moving parts, including hinges, rollers, and springs. This enhances the overall performance of the garage door and contributes to its longevity.

7. The Symphony of Renewal: Enjoying the Benefits of Fresh Springs

As I witnessed the seamless orchestration of spring replacement unfold, I realized that this maintenance task wasn’t just about addressing wear and tear; it was a symphony of renewal for my entire garage door system. Fresh springs brought with them a cascade of benefits that revitalized the performance and safety of the garage door:

  • Smooth and Quiet Operation: The most immediate impact of new springs was the restoration of a smooth and quiet garage door operation. The jerky movements and unsettling noises were replaced by a rhythmic hum, signaling the optimal counterbalance provided by the fresh springs.
  • Enhanced Safety: Worn-out springs pose safety risks, and their timely replacement is a proactive measure to prevent accidents and injuries. Fresh springs ensure that the garage door operates with stability and reliability, minimizing the potential for unexpected malfunctions.
  • Extended Lifespan: The replacement of worn-out springs contributes to the overall longevity of the garage door system. By addressing the root cause of wear and tear, homeowners can enjoy an extended lifespan for their garage door components.
  • Reduced Strain on Other Components: Worn-out springs place increased stress on other components of the garage door system, including cables, pulleys, and the opener. By replacing the springs, the overall strain on these components is reduced, mitigating the risk of additional repairs.
  • Peace of Mind: Perhaps the most significant benefit is the peace of mind that comes with knowing the garage door is equipped with fresh, reliable springs. This assurance extends beyond the immediate future, providing a sense of security and confidence in the long-term performance of the system.

Conclusion: Harmonizing with the Rhythms of Garage Door Maintenance

As I reflect on my journey through the signs of worn-out garage door springs and the renewal that comes with timely replacement, I’m reminded of the delicate balance required in homeownership. Just as a symphony relies on each instrument playing its part, a well-maintained garage door system thrives on the harmony of its components.

According to Garage Door Repair, decoding the signs of worn-out garage door springs is not just about addressing mechanical issues; it’s a metaphorical tuning of the orchestra, ensuring that each element contributes to the overall performance. In embracing the rhythms of garage door maintenance, homeowners can enjoy a seamless symphony of reliability, safety, and peace of mind—a melody that echoes through the daily cadence of home life.

El Cajon Overhead & Garage Doors

238 Lento Ln, El Cajon, CA 92021, United States

619-503-3574

Page 2 of 3

Powered by WordPress & Theme by Anders Norén